Claim types
Every claim is tagged with a type badge that is visible in the list and in the detail view.| Type | Badge colour | Points awarded | Description |
|---|---|---|---|
| Claims | Blue (#E5F3FF background, #144DFF text) | Yes | Standard invoice claim — loyalty points are credited on approval |
| Warranty | Purple (#F9EBFF background, #7D00CC text) | No | Product coverage registration — no points are awarded regardless of configuration |
For Warranty claims, the Points Awarded field is hidden in the approval modal and the system enforces a points value of zero server-side. Approving a Warranty claim never credits points.
How a claim is submitted
Partner initiates the claim
In the channel partner mobile app, the partner taps New Claim, selects the claim type (invoice or warranty), and chooses how to capture the invoice.
OCR extraction (Scan Receipt)
If the partner selects Scan Receipt, they upload one or more invoice photos. Loyalife’s OCR engine reads the image and automatically populates:
- Product names and descriptions
- Product codes / SKU identifiers
- Quantities, unit prices, and line totals
Product catalogue matching
Extracted product codes and names are matched against the program’s product catalogue using approximate (vector-embedding) matching. The system attaches a match confidence score to each line item.
Partner reviews and corrects
On the review screen, the partner sees all extracted line items and can edit any field, add missed items, or remove incorrect ones. Edited fields are flagged so admins can distinguish OCR-extracted values from manual corrections.
QR code scanning (if applicable)
For QR-linked claims, the partner scans the product QR code instead of uploading a photo. The system validates the code and pre-fills product details automatically.
OCR signals in the admin view
When an admin opens a claim submitted via Scan Receipt, the line items table shows additional signals to help prioritise review:| Signal | What it means |
|---|---|
| OCR confidence | Per-field score (description, product code, quantity, unit price, amount) on a 0–1 scale. Low scores highlight fields likely to be misread. |
| Match confidence | How closely the extracted product matched the programme catalogue — high cosine similarity indicates a strong match. |
| Match method | How the match was found: exact code, approximate name, or vector-embedding match. |
| Added by admin | Flags any line item manually inserted by an admin rather than extracted by OCR. |
| Duplicate invoice | If the same invoice number exists in a previous claim, the related claim IDs are listed as a warning. |
OCR confidence scores reflect the original extraction snapshot. Even if a partner edited a field, the admin view shows the original OCR reading alongside the corrected value so you can compare what was read vs. what was changed.
Handling low-confidence extractions
When a field’s OCR confidence is low (typically below 0.7):- Open the original invoice image from the claim detail.
- Manually verify the field value against the source document.
- Edit the line item if the extracted value is incorrect.
- Enter remarks explaining any corrections before approving.
Duplicate invoice detection
Loyalife checks whether the same invoice number has been used in a previously processed claim. If a duplicate is detected:- The admin review screen shows a warning banner listing the related claim IDs.
- The claim is not automatically rejected — the admin must decide whether the duplicate is legitimate (e.g., a split shipment on a single invoice) or fraudulent.
Photo upload limits
| Limit | Detail |
|---|---|
| Maximum photos per claim | Configured per program (typically 1–3) |
| Accepted formats | JPG, JPEG, PNG |
| Recommended resolution | 1 MP or higher for reliable character recognition |
Product codes must exist in the Rule Engine’s Attributes Manager before they are available for OCR matching. If a product is not in the catalogue, it appears as an unmatched item and requires admin intervention.
Filtering claims
The filter bar is available on both the Pending Actions tab and the All Status tab.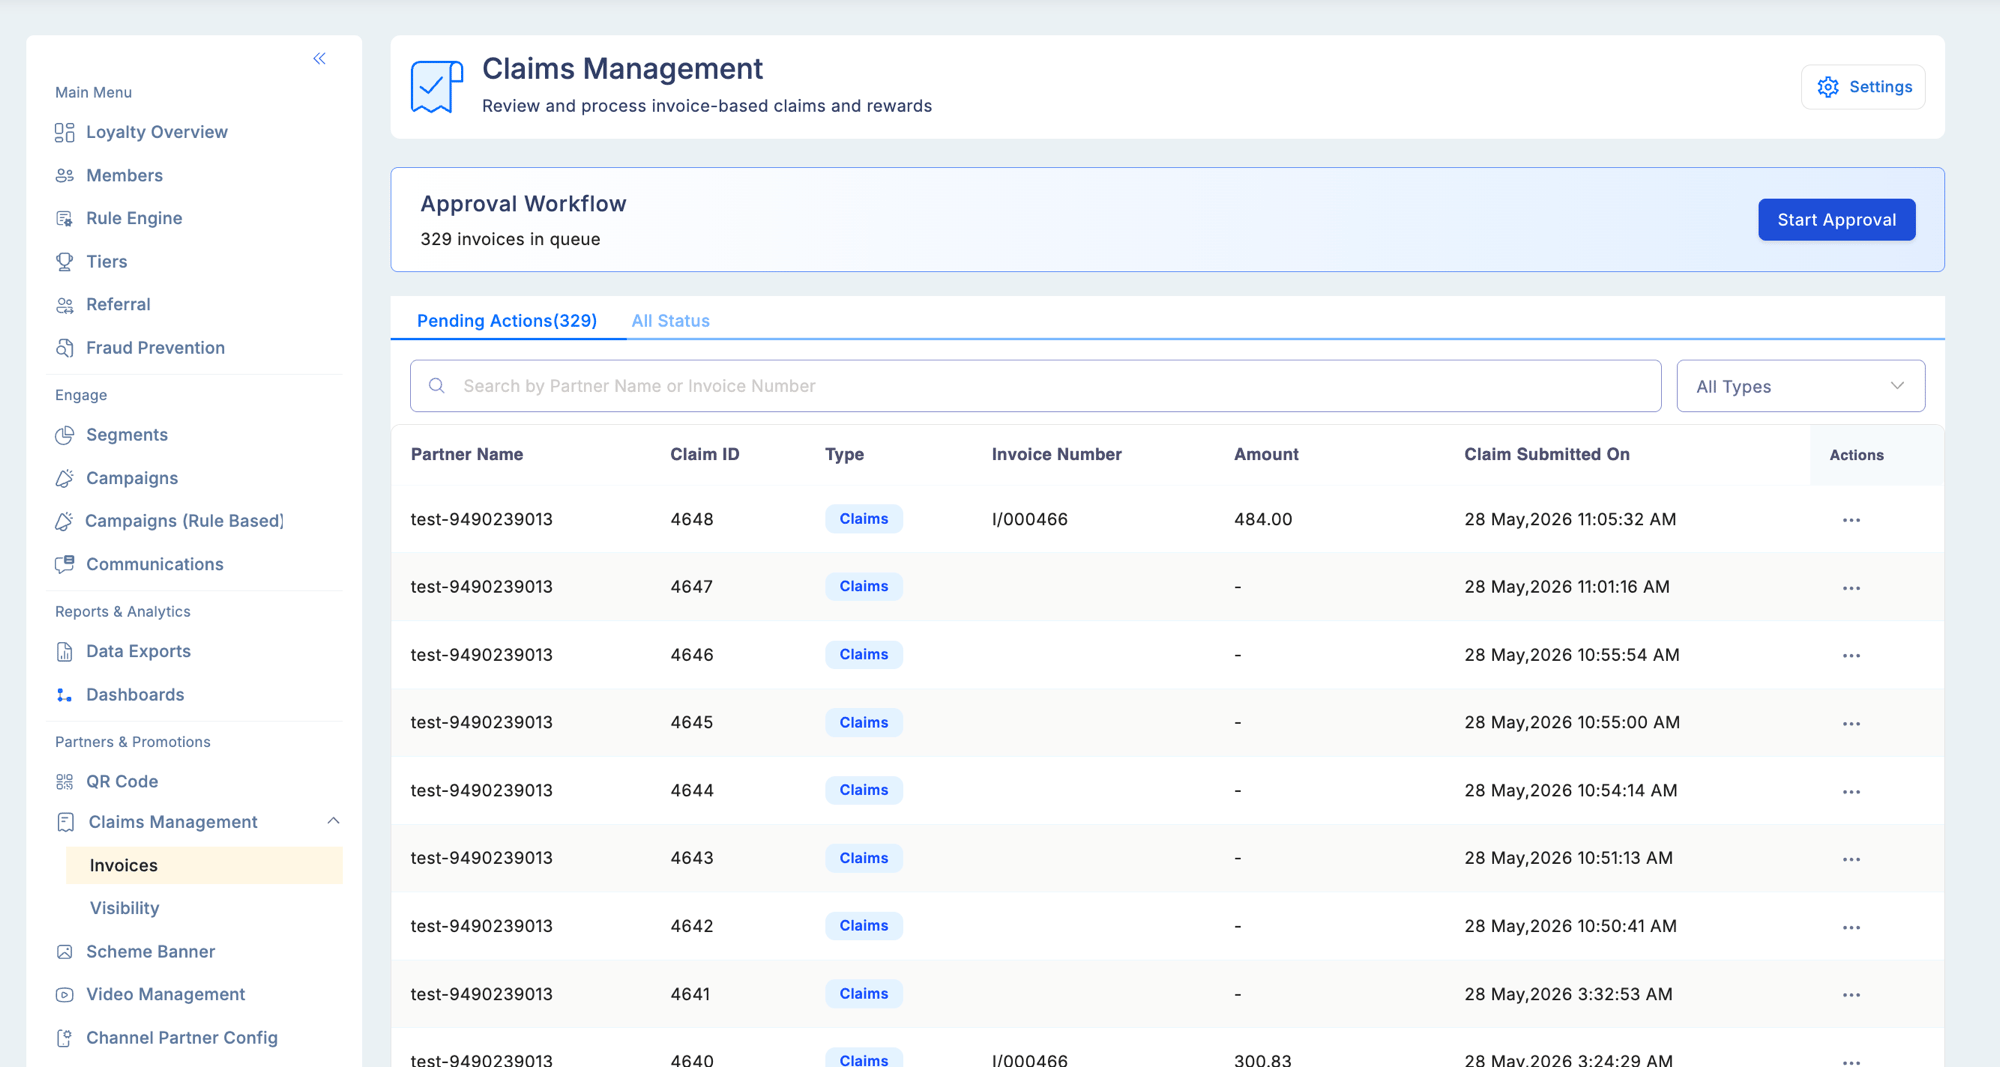
| Filter | Options |
|---|---|
| Claim Type | All Types, Claims, Warranty |
| Partner Name | Free-text search |
| Invoice Number | Free-text search |
The approval workflow
Invoice claims go through two levels of approval before they are finalised.Step 1 — Approver 1
Approver 1 is the first-level reviewer. The role assigned to this step varies by program — it could be a field manager, area coordinator, or any equivalent role (e.g., ASM, RSM). This step requires the Approve Assigned Invoices permission.Open a pending claim
Go to Partners & Promotions → Claims Management → Invoices and select a claim from the Pending Actions tab.
Verify the invoice
Review the claim details, line items, and any attached documents submitted by the partner. For OCR claims, check confidence signals and correct any low-confidence fields.
Add mandatory remarks
Enter remarks explaining your verification decision. Remarks are required before the claim can move forward.
Upload a supporting document (optional)
Attach a supporting file if needed. Accepted formats: JPG, JPEG, PNG, PDF. Maximum file size: 5 MB.
Step 2 — Approver 2
Approver 2 is the final decision-maker.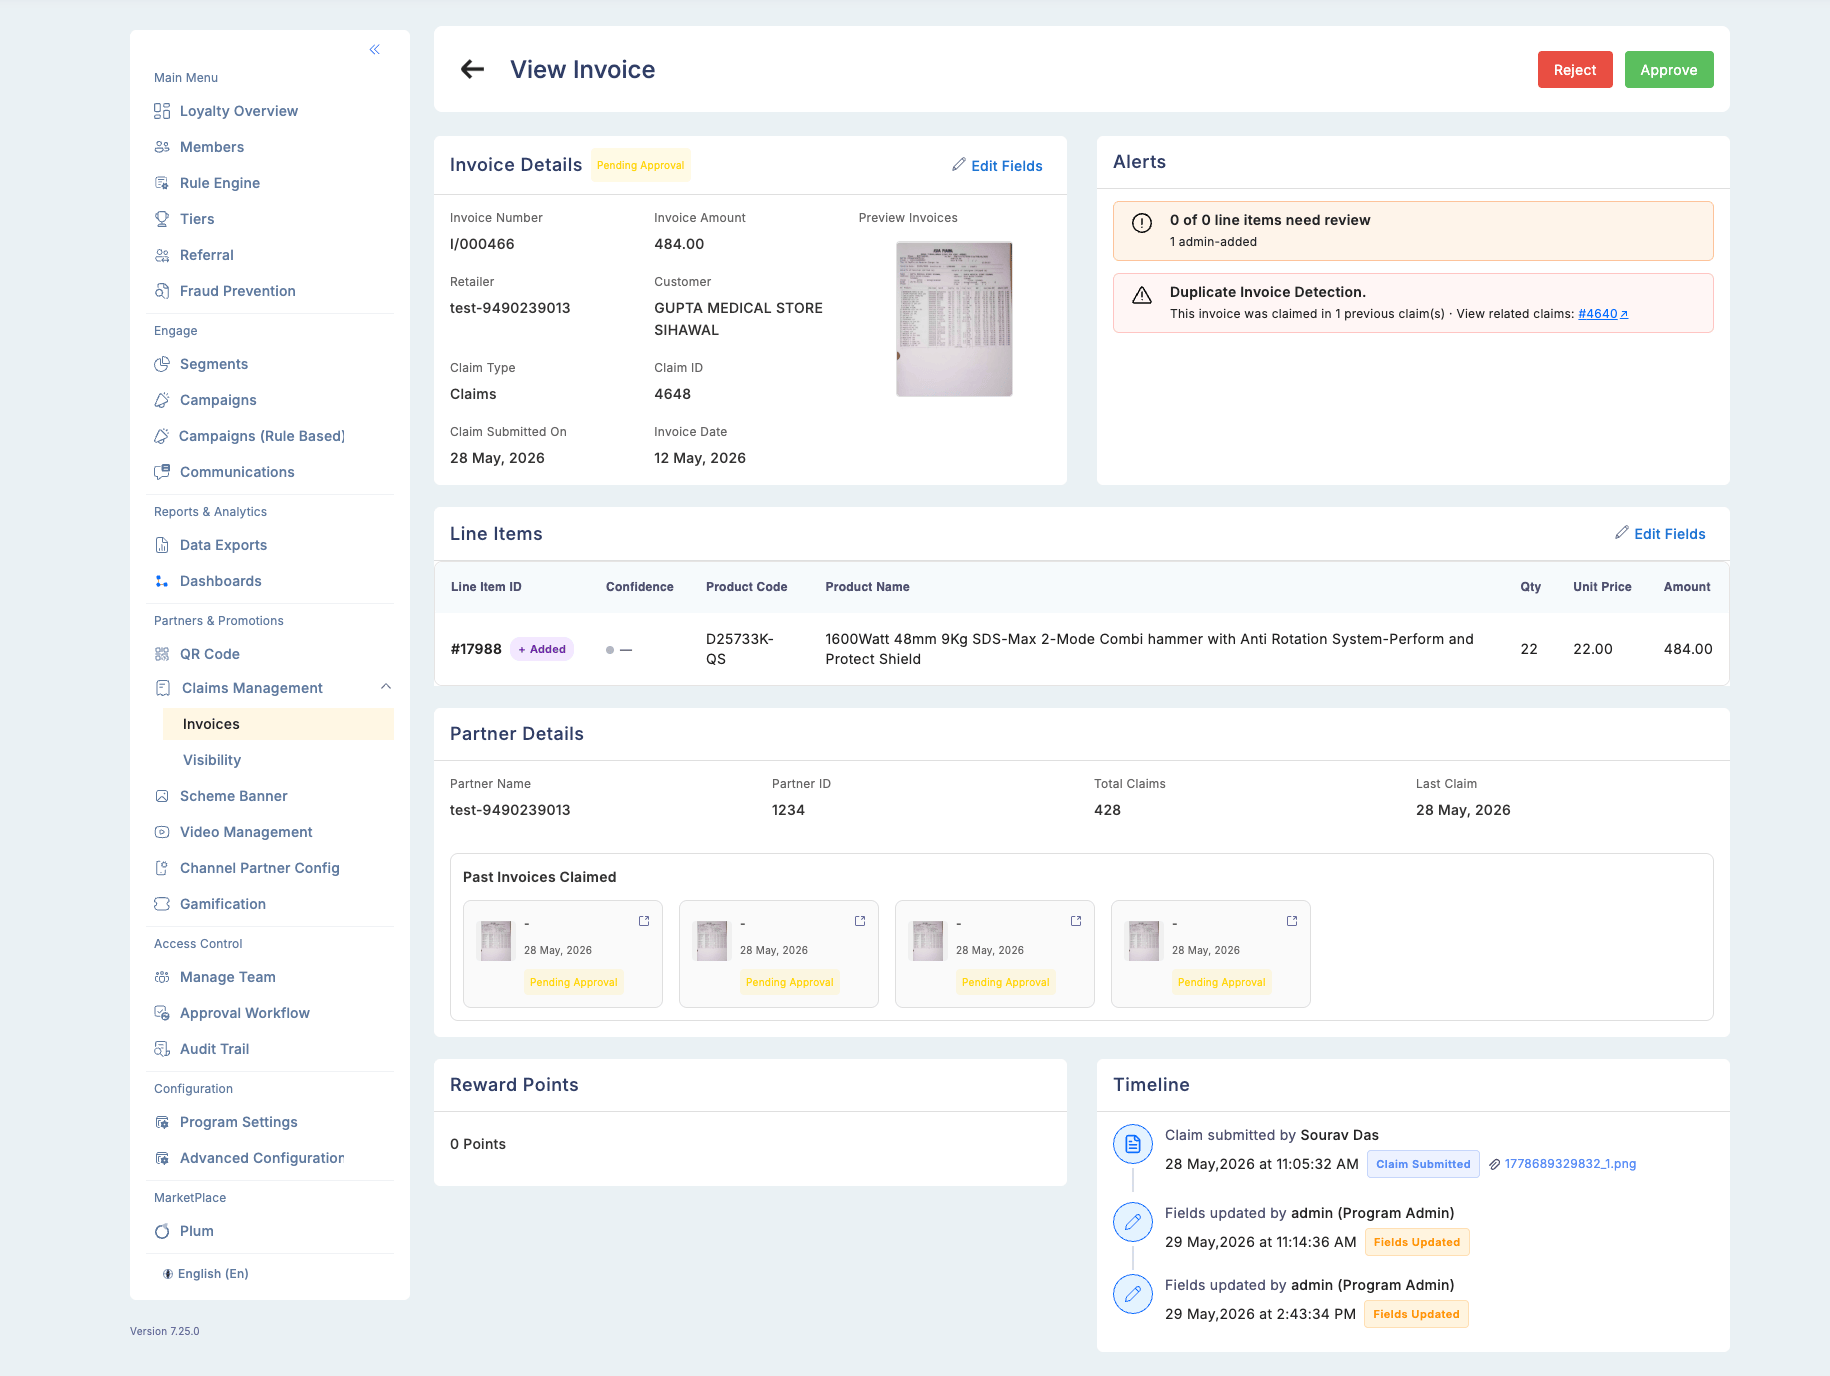
Open the claim
Claims awaiting final action appear in the Pending Actions tab for Approver 2. Open the claim to see the full detail view.
Review all information
The detail view shows invoice details, any system alerts (including duplicate warnings), line items with OCR signals, and the remarks and supporting document uploaded by Approver 1.
Supporting documents
Approver 1 may attach a supporting document during verification. Documents must meet the following requirements:| Requirement | Detail |
|---|---|
| Accepted formats | JPG, JPEG, PNG, PDF |
| Maximum file size | 5 MB |
| Visibility | Approver 2 can view the document in the claim detail; it is also downloadable from the timeline |
Timeline and audit trail
Every action taken on a claim is recorded in the timeline section of the claim detail view. Each timeline entry shows:- The user who performed the action
- Their role
- The date and time of the action
- Any remarks they entered
- Any supporting document they attached (with a download link)
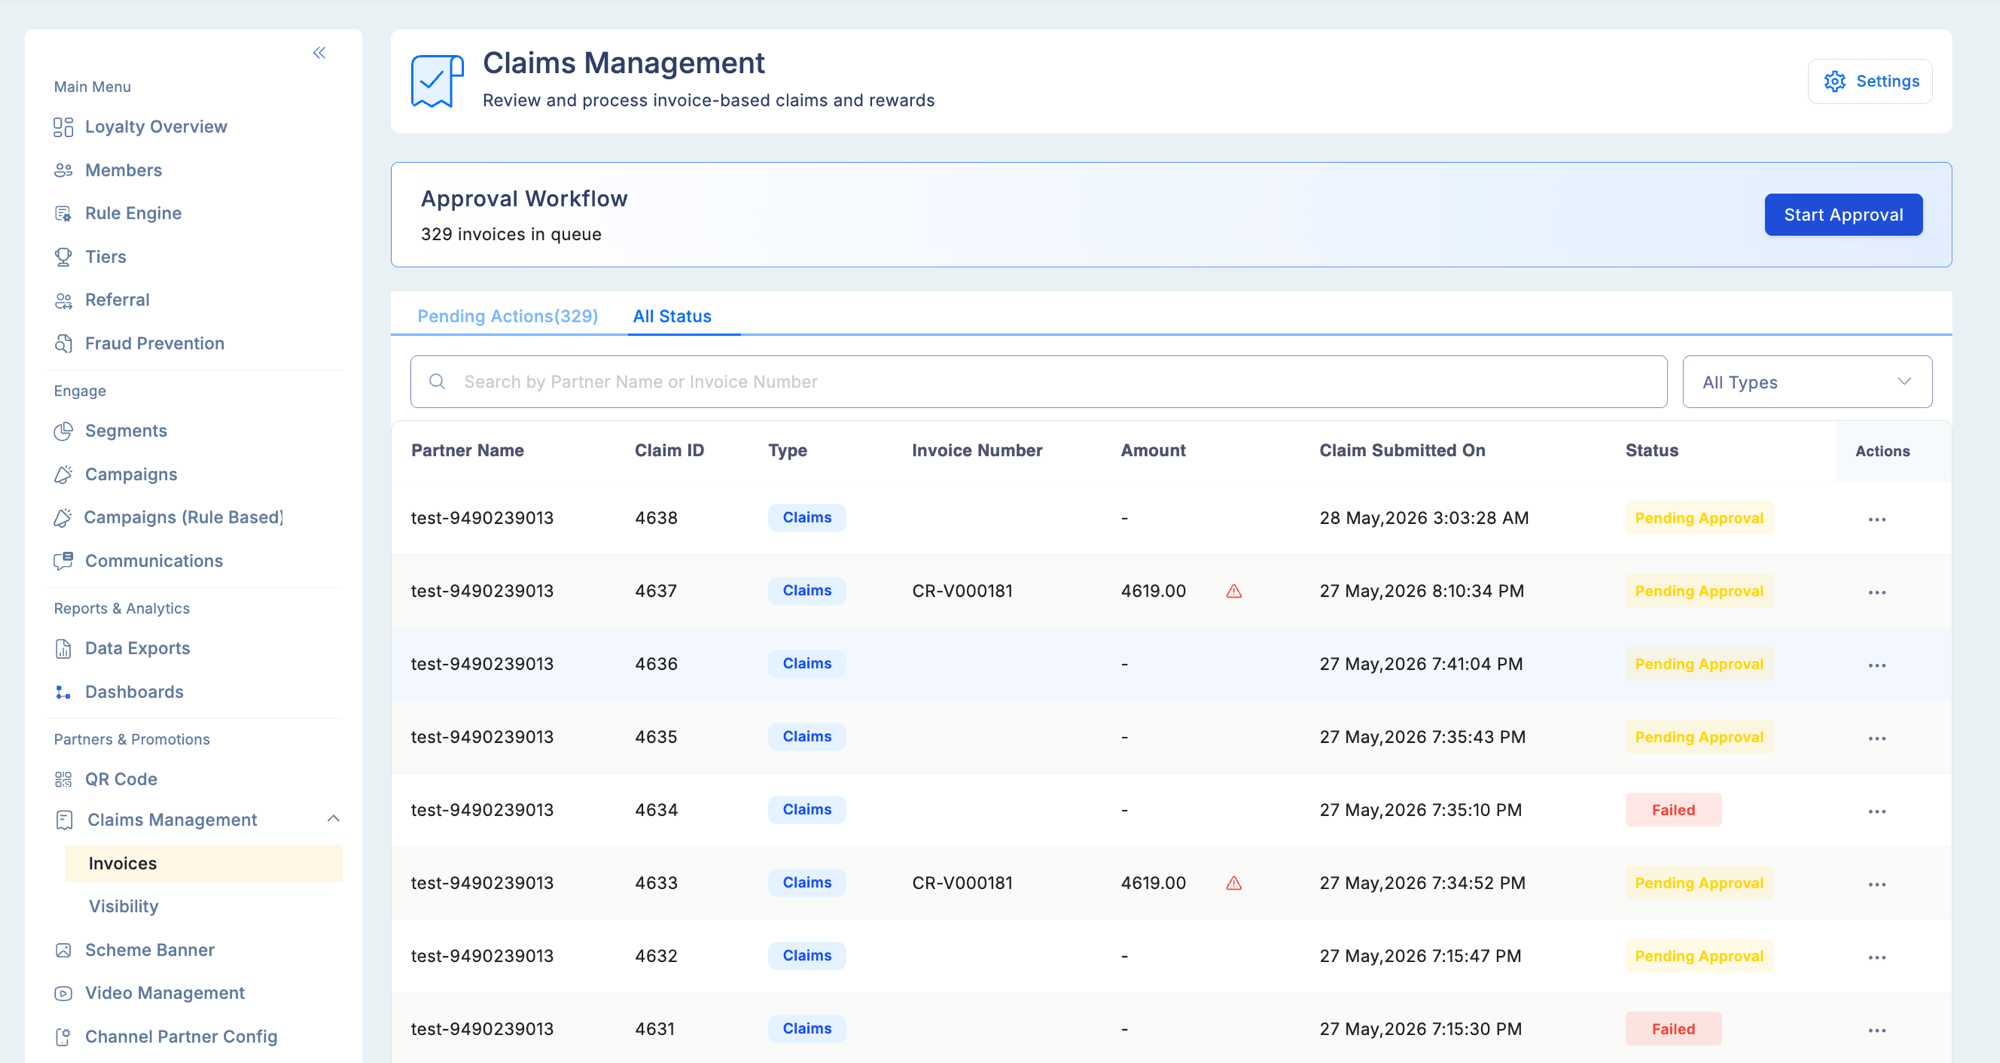
Claim statuses
| Status | Meaning |
|---|---|
| Submitted | Claim received from the partner, awaiting Approver 1 action |
| Verified | Approver 1 has reviewed and submitted remarks |
| Pending From Others | Approver 1 has completed their step; awaiting Approver 2’s final decision |
| Approved | Approver 2 has approved the claim; points credited (Claims type only) |
| Rejected | Approver 2 has rejected the claim; no points credited |
Access to invoice claims requires the View Claims permission. Approving requires Approve Assigned Invoices for Approver 1, and the corresponding approval permission for Approver 2.
Claim alerts and settings
Navigate to Partners & Promotions → Claims Management → Settings (gear icon in the top right) to configure program-wide claim validation rules.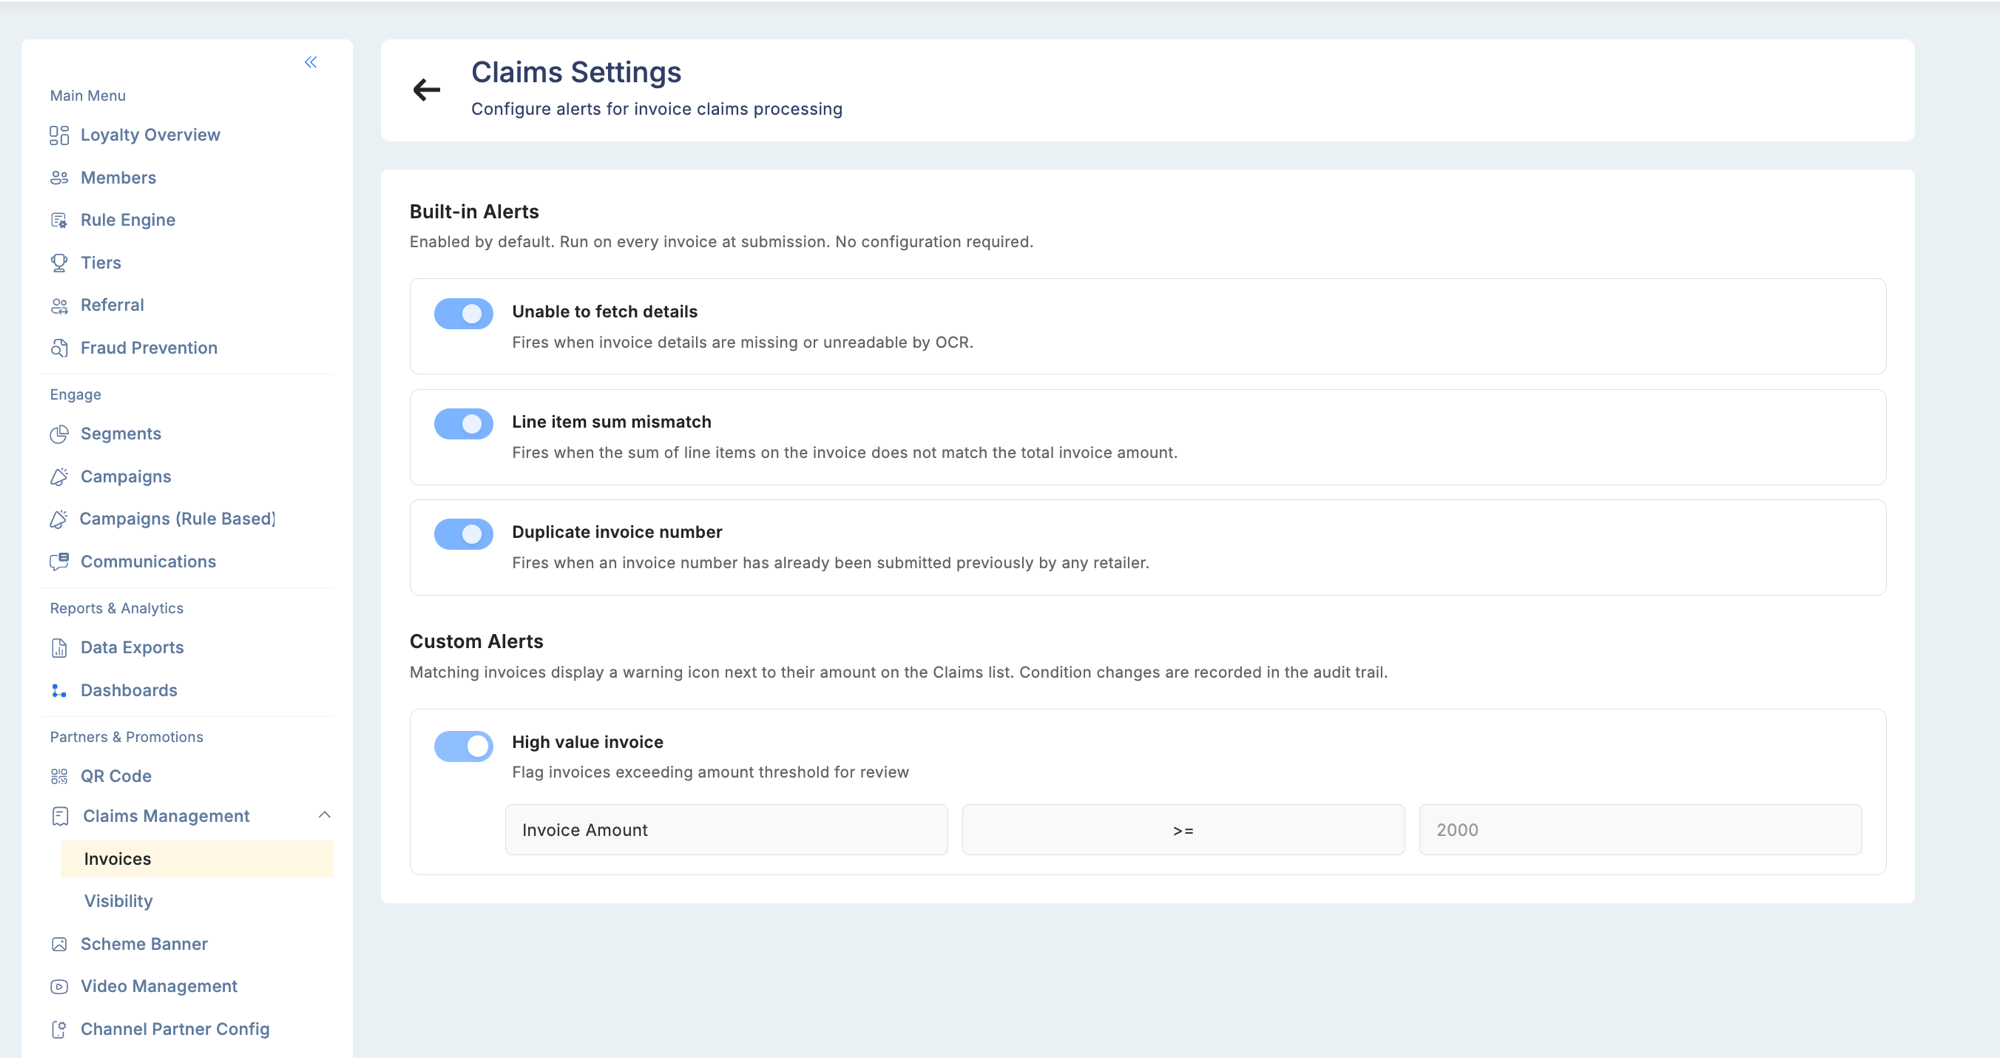
| Alert | When it fires |
|---|---|
| Unable to fetch details | Invoice image is missing or unreadable by OCR |
| Line item sum mismatch | Sum of line items does not match the invoice total |
| Duplicate invoice number | The same invoice number has been submitted in a previous claim |
Troubleshooting
OCR extracted incorrect product details.- Review the original invoice image in the claim detail.
- Edit the line items manually and enter the correct values before approving.
- Verify the product code exists in Rule Engine → Attributes Manager.
- If the product was recently added, allow time for the catalogue index to update.
- Manually enter the correct product code in the line item editor.
- Partners should photograph invoices flat, in good lighting, without glare or shadows.
- A minimum resolution of 1 MP significantly improves extraction reliability.